Our close friends, Amy and Joel, are welcoming a baby girl in June, and I wanted to throw a mini baby shower to welcome her! We invited a few of our favorite little families.
The theme was very simple- pink, pink, and more pink. Tough for all the guys that were invited!
The decor
I made another banner for the mantle. I used these awesome glitter letters from Hobby Lobby. The background paper is cut into 4.5 inch flower shapes (accent essentials cartridge) and the white is 4.25 inch. I used double stick tape and a matching ribbon to put it all together. Pretty painless.
I borrowed the lanterns from my ma-in-law. I think they are from Party City. And I made the tissue pom poms.
The food
For appetizers, I put together a simple veggie tray with ranch, a spinach parmesan dip from Costco, and Wholly Guacamole. With an array of chips, everyone was happy for a while.
For our main course, I served Pioneer Woman's Dr. Pepper pulled pork with King's Hawaiian rolls (and pickles!) and Barefoot Contessa's tarragon chicken salad (minus the grapes) with mini croissants. I also had fruit salad on the side. For those picky eaters (like my child), I had a small deli tray with meat, cheese, and crackers.
The cake!
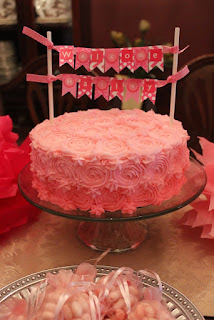
For this cake, I used the same recipe that I used for Leah's birthday cake, but I left out the sprinkles. This recipe is a yummy lemon cake that turns out very moist. It is my new favorite!
I made a two-layer 8 inch cake and used white buttercream for a thin crumb coat. Then, I took a small circle cookie cutter and gently pressed it into the cake where I wanted my roses. This was used as a guide so my roses would be about the same size and shape all throughout my cake.
Next, I put a small amount of soft pink coloring into my icing. I made a piping bag of this icing out of about 1/3 of the icing. Then I added more coloring and made a second bag. Then a little more coloring for the last bag. This made the ombre effect on the cake. I used a star tip to create the roses. If you try this technique, start from the bottom of the cake with the darkest icing. Each individual rose should start from the middle and work out. Wherever my crumb coat showed through, I put a small star.
For the banner, I used cookie sticks (in the baking aisle at Michael's), ribbon, scrapbook paper, and letter stickers.
We all had a great time!


