Background

Friday, January 18, 2013

Bonkers for Beets


I grew up thinking beets were gross. I never even tried them. Something about the unnatural color and weirdness. But, about a year ago, I found out I LOVE beets. Mostly roasted beets. So, every time I go to a restaurant that has a beet salad on the menu, I have to have it!
I had the beet salad at Buchon in Las Vegas. Magical! I had the beet salad for our anniversary at Haven in Houston. Delicious! I make roasted beets regularly in my own home. And most recently, on our traditional dinner out at Ouisie's Table for Christmas (with bestie and her hubby), I had their beet and celery salad. Yum!

So, I am setting out to recreate it at home. Here is my attempt.

Ouisie's Roasted Beet and Celery Salad
1 package of salad greens
1-2 fresh beets, roasted and sliced
2 stalks celery, sliced
1 orange, supremed into segments
 Lemony vinaigrette ( I used Marie's Lemon-Herb)

 To roast your beets, preheat your over to 425 degrees. Then, on a baking sheet, make a foil packet for your beets. I use Kelsey Nixon's technique. She puts a sheet on the bottom, puts the beets down, and then places another foil sheet on top. Then fold the foil together on all 4 sides. Roast them for about 45 minutes to an hour, or until tender.


When they are done, let them cool for a few minutes in their packet. Open it up carefully and let the steam escape.


Then use a paper towel to rub off the skins.


 Slice and cool in the refrigerator until ready to assemble the salad.


Use a vegetable peeler to peel the coarse part of your celery from the back of the stalks. Then slice thinly.


To supreme the orange, use a knife to cut the peel off the outside. Then cut between each membrane to get the orange segments.


Slice your beets into bite-sized pieces.


Assemble all ingredients on a salad plate.


Drizzle with vinaigrette. Add salt and pepper. Done!


We thought this salad was wonderful! I paired it with pasta, but it would be great with most main dishes!


Here's another variation I have made at home: so good!!

Using my mom's technique, I thinly slice a red onion and soak it in balsamic vinegar for a few hours. Add salt too!
Then, when it's time for dinner add your salad greens, sliced roasted beets, and sliced avocado. Top with your onions, but save that vinegar! Whisk together about a tablespoon of the vinegar with about 3 T olive oil. Add salt and pepper. Drizzle over salad. Yummy!!

Crowd-pleasing Cole Slaw

One of my favorite meals is a big, juicy burger made by my hubby. We usually just eat chips as a quick and easy side, but I had been craving cole slaw. So, I took Bobby Flay's recipe and gave it a little tweek and found a winner. I made it again last night, and Justin can't get enough!

Creamy, Spicy Coleslaw
adapted from Bobby Flay's recipe

Veggies:
2 bags of rainbow slaw (We love this stuff! It really holds up, unlike cabbage. And a little healthier???)
3 scallions, chopped

Dressing:
3/4 c. mayo
2 T sugar
1 t celery seed
3 T apple-cider vinegar
1 T Sriracha chili sauce (or to taste)
salt and pepper

Combine all dressing ingredients in a large container (with a lid!). Whisk until smooth.  


Add rainbow slaw and scallions.


Put the lid on and SHAKE! 


You can eat this right away, but it's even better when it sits an hour or two in the fridge.  Enjoy!


Sunday, December 30, 2012

Bridesmaid (and Bride) Cookies

My mother-in-law, sister-in-law, and I hosted a bridal luncheon for Justin's cousin this weekend. My ma-in-law did all of the work, but I decided to contribute by making a bridesmaid's dress cookie I'd seen on Pinterest and thought it would make a great favor for the guests!
The bride's colors were silver and white, so I had to figure out how to make silver work.

I wish I had taken pictures of the first few steps, but I was covered in flour! So, maybe next time.

Step 1: Make cookie dough. I used this recipe.

Step 2: Using cardstock, make a cutout of the dress shape. (I couldn't find the shape I wanted...)

Step 3: Using the template, roll out and cut dough with a paring knife. I know... tedious. But they were worth it. The cookie recipe link has pictures of her using this same technique. I cut out 36 cookies, and it took two batches of the recipe.

Step 4: Bake! Take them out as soon as you see ANY brown on the edges!
***I made 1/2 of the cookies a few days beforehand and froze them in an airtight container. Let them thaw in their container before icing.


Step 5: Make royal icing. I used DOUBLE this recipe. Using a flower tip, make the flowers on wax paper. I put a little edible pearl in each flower since the middle wasn't too pretty. I also had some extra white, so I decided to make a special cookie just for the bride. I outlined it in white with a scallop at the bottom and then flooded it.


Step 6: I added a few drops of Americolor Super Black to the remaining icing. It looked UGLY! It was like a gray/purple. But, as my husband says, "It's what the 'customer' wants." And, luckily, looked much better once it became silver. 


Step 7: Ice the outline around each cookie using a #4 tip. Reserve the icing left in your piping bag for tomorrow. Put it in a ziploc bag.

Step 8: Add a teaspoon of water to the remaining icing. Stir. Repeat until your icing has the consistency you want for flooding. (If you pull your spoon through it, you want it to fill back in in about 2-3 seconds. Let it sit, covered, for 15 minutes. Then pull your spatula through it to pop the air bubbles.

Step 9: Flood the middle. Fill it very full! I use a small squeeze bottle for this. And a toothpick to make sure the icing touches the sides and the boo-boos in the outline. Let dry overnight.


Step 10: Here's how to get the gray to be silver! Mix some silver luster dust (found in your baking aisle at the craft store) with some lemon extract until it's the sparkle you want. Then, brush it on each cookie with a small pastry brush (looks like a thin paint brush, also in baking aisle at craft store).


Step 11: Use your icing from the piping bag to attach the flowers to the middle of your cookie. The flowers should peel right off!

Step 12: Let dry a few hours, and package them!


They were a big hit! My father-in-law requested an extra dozen, so they must have been good! 


Thursday, November 8, 2012

Halloween Party on a Budget

Leah is the only grandchild on both sides, so she is our family's only trick-or-treater. So, we have had family over each Halloween to see our cutie all dressed up!

This year she was Minnie Mouse, inspired by not only her love of Minnie but also the sequined ears her Mimi and G brought back from Disney World. My mom and I  (mostly my mom) made her outfit. Isn't she cute?


This year, I was looking to throw a party that was fun and festive, but also budget-friendly.

A few weeks back, Leah and I went to Dollar Tree and got some serving pieces and decorations. My mother-in-law handed down some of her awesome decor including the spider web tablecloth and hanging black spider webs.


I made a banner for the entryway using my trusty Cricut.


I also made a festive Halloween menu:
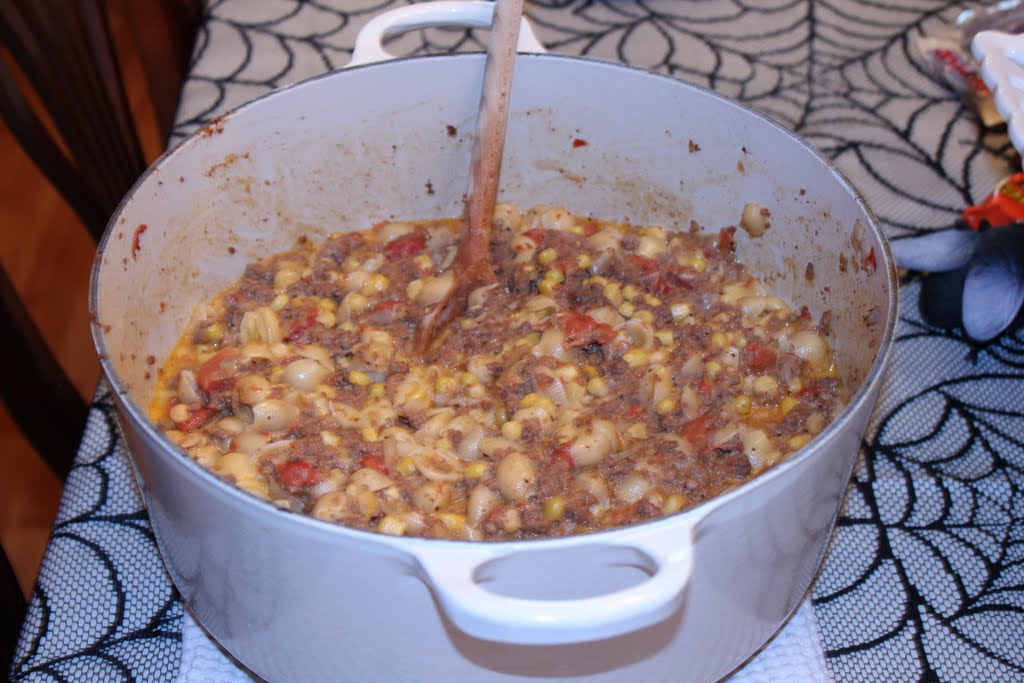
Ghoul-ash (a tradition my mom started years ago)


Mummy dogs (Pinterest find)

 
Pumpkin Cheese Ball (Food Network Magazine)


Spiderweb and Candy Corn Cupcakes (Country Living Magazine)


We had a great time! Here's one more picture of Minnie with the Minnie Mouse pumpkin I carved for her.


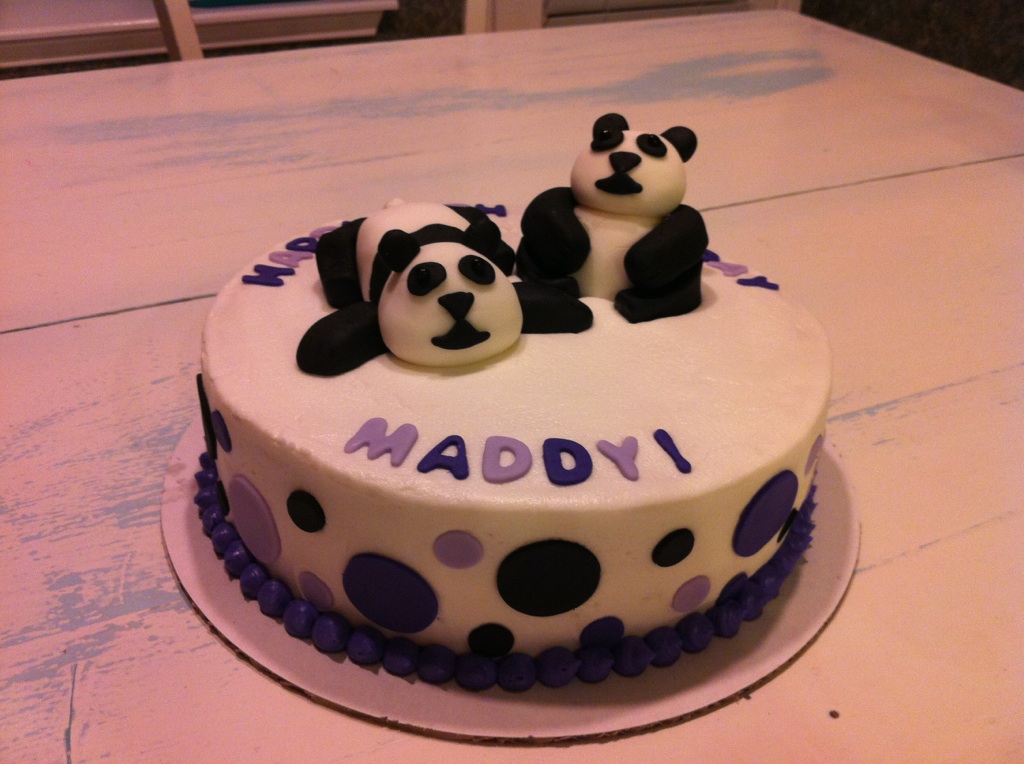
Panda Cake

I made this cake for a former co-worker's daughter, who also happened to be one of my former students! So, I was happy to go all out.
It was orignally supposed to be pandas with bamboo, but the birthday girl loves purple, so I got some creative license. Here is how it turned out.

Not bad for my first big cake! And, the birthday girl liked it. That's what matters. :)

Activities Advent Calendar

We have holiday traditions- decorate the tree together, watch Home Alone and Home Alone 2, go to Christmas Eve service and eat a  delicious dinner at Guadalajara, etc. However, this year, I thought I'd use some Pinterest inspiration to make one of those cute advent calendars that can last for years! I think it will be a fun tradition for Leah as she grows up.

So I looked through the ideas for activities on Pinterest and wrote down the ones that we could do. Then I wrote them out on a numbered list (1-24). Keep in mind when doing this what day of the week things will fall on. For instance, I know we are more likely to do some bigger things on Saturdays. Also, my mom always signs us up to decorate a gingerbread house at the church, so I made sure that was on the right day.

Keep your activities general- Instead of "Watch Home Alone," I put "Watch a movie." Instead of "Make a handprint wreath," I put "Make a Christmas craft." You get it. Also, a few things are repeated.
Here is my list:
1-Decorate the tree
2-Set up the Nativity scene
3-Decorate the inside of our house
4-Read a Christmas book as a family
5-Invite the neighbors over for dinner
6-Make gifts for grandparents
7- Read or tell the Christmas Bible Story
8-Make a gingerbread house
9-Make breakfast together
10-Make a Christmas craft
11-Make marshmallows
12-Go on a family outing
13-Read a Christmas book as a family
14-Make neighbor gifts
15-Deliver neighbor gifts
16-Put old toys in a sack to donate
17-Wrap presents
18-Watch a movie together
19-Write a letter to Santa
20-Make a birthday card for Jesus
21-Go look at Christmas lights
22-Read or tell the Christmas Bible story
23-Watch a movie together
24-Go to church and eat a yummy dinner

Here are my activities cards.


I cut 24 3"x1" pieces of cardstock in 3 different colors. Then I used a white scrapbooking marker to write the activities. I then cut 24 2.5"x .75" pieces of coordinating paper for the tops. Next, I used a tiny bit of glue to attach them. I used my NEW Purple Cow laminator (bought for $20 at Costco!) to laminate the cards.


For the board, you will need:
1 piece of 24"x 12" plywood
24 mini clothespins
spray paint in a coordinating color
bottle of acrylic paint in coordinating color
small embellishments
a spool of coordinating ribbon
hot glue gun (I also used mini glue dots and spray adhesive)
Modge Podge (I used matte finish)

1. Paint the board with the acrylic paint (you can use spray paint, but I had ivory paint on hand). Make sure you paint the edges.
2. Glue the ribbon to the edges of your board. I used spray adhesive on the front and hot glue on the back.
3. Spray paint your clothespins. Don't worry about the back, but make sure to get every visible surface.
4. For the numbers, I used my Cricut to cut .75" circles. You could make any small shape. Then, I used my white marker to write the numbers. I laminated these also. I attached them with a glue dot.
5. Once all of your pieces are dry, place the clothespins (with cards) on the board until you are happy with their placement. I used hot glue to attach them to the board.
6. Modge Podge your embellishments in desired places.

Here is the finished product!


I am planning to attach it to the wall with Command strips. It is very light. However, you could attach ribbon to the back also to hang it on a nail.

I am excited to try it out! Come on December!